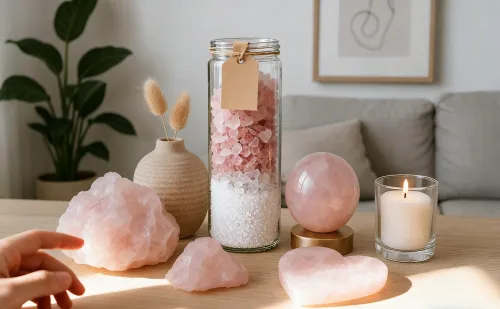
Well, maybe you've held a piece of raw rose quartz before—that rough, cloudy crystal with whispers of pink. There’s something deeply satisfying about transforming that untouched mineral into a gleaming pendant you can wear or gift. The thing is, turning stones into treasures isn’t about magic tools or professional workshops. At some point in your crafting journey, you’ll discover that with simple techniques and patience, these earthly fragments become personal talismans carrying warmth in their polished curves. Anyone can uncover the inner glow hiding within these stones—your hands just need gentle guidance to reveal it...
What we'll explore in this guide
- Essential Tools and Materials
- Stone Selection Criteria
- Basic Shaping Techniques
- Polishing for Smooth Finish
- Visual and Tactile Quality Indicators
- Attachment Mechanism Options
- Long-term Preservation Methods
- Skill Advancement Pathways
Picture your workspace: a sturdy table, natural light, and your chosen stones holding silent potential. You'll need basic items like diamond grit files and pH-neutral soap for initial cleansing—something many overlook but prevents contaminants affecting your piece later. The key here isn't complexity; it's about creating a ritual space where focus thrives.
Invest in safety essentials too—nothing kills creative flow like inhaling rock dust. A simple dust filtration system rated HEPA 13+ makes breathing easy while you work. Anyway, the beauty of starting small? You'll realize how ordinary items like silicone grips and water bowls become sacred tools in your craft.
Stone Selection Criteria
Ever found a stone that just feels right in your palm? That's the beginning. Stones around 6-7 Mohs hardness offer ideal workability—they resist crumbling yet respond well to shaping. Look for ones with minimal visible fractures as these can deepen during crafting.
Here’s an insider trick: conduct a simple solvent dye test before drilling. Just dab some colored solvent along potential weak points—if it seeps in deeply, you might choose a different stone. The thing is, embracing imperfections becomes easier when you know which flaws threaten structural integrity.
Basic Shaping Techniques
Water as your shaping ally
Always keep a water basin nearby. Wet grinding prevents heat buildup that could fracture your crystal—think of it as protecting the stone's inner harmony. Rotary tools are fabulous here, but remember—keep RPM under 10,000 for controllable precision.
Contouring curves
Start with gentle passes using diamond-coated files. Move your hands rhythmically, letting the stone guide the pressure needed. You may notice how water transforms pink dust into milky rivulets—this slurry actually aids polishing later!
Polishing for Smooth Finish
This stage feels like coaxing light from within. Start with coarse 120-grit paper, progressing methodically through to 3000-grit. Each step unveils deeper translucency as surface irregularities fade. Feel how tactile roughness transforms week after week.
If you prefer satin finishes over mirror shine? Stick between 800-1200 grit after your final polish—reduced reflections create subtle elegance. Anyway, patience rewards you here; rushed polishing leaves visible haze. Set small milestones like achieving cloud-free sections before moving to finer grits.
Visual and Tactile Quality Indicators
Hold your stone near a window post-polish—distortion-free light reflection signals success. Run your fingertip along edges; smoothness should feel like silk. You may discover hidden fractures only visible under sunlight—treat them as cosmic feedback, not defeats.
Thermal sensitivity matters too—avoid sudden temperature changes exceeding 10°C per minute during work. A stable stone feels energetically balanced, which translates to enduring physical beauty.
Attachment Mechanism Options
How will your creation hang? That depends on how it speaks to you. Small stainless steel jump rings around 6mm resist tarnish while supporting most cords—a reliable choice for vibrational integrity. For holes, diamond core drill bits create clean channels.
Always chamfer hole edges—those micro-bevels eliminate dangerous sharpness without compromising visual flow. Compatibility with chains or leather cords? Test hardware against 1mm-2mm diameters during mock hanging sessions.
A Gentle Invitation
Why not start with shaping one palm-sized stone this weekend? Observe how your focused energy transfers into crystalline transformation—each polishing session becomes meditation. Trust that first spark of inspiration when raw edges turn luminous under your hands...
Long-term Preservation Methods
Your ornament's longevity depends on loving maintenance. Apply natural wax annually as it creates hydrophobic protection—imagine sealing joyful memories into the surface. Store pieces in breathable pouches away from prolonged UV exposure to prevent dullness.
Check epoxy resin bonds periodically if used; quality stone adhesives withstand years of subtle movements. Anyway, preservation becomes effortless ritual—like clearing dust from a sacred space before meditation.
Skill Advancement Pathways
Once comfortable with single stones, try creating matched pairs—earrings demand symmetrical precision stretching your skills. Vibratory tumblers using silicon carbide media produce professional finishes efficiently when batch processing.
Notice how your hands grow steadier every month? That's crystalline wisdom entering your muscle memory. Soon you'll gauge polish levels by fingertip alone—natural intuition guiding technical mastery. Keep unfinished experiments nearby; they become roadmaps to your evolution.